Есть проблемы с производительностью и стабильностью работы RDP в Windows 10 1803.
Решается так:
Если заменить данные файлы в каталоге C:WindowsSystem32 на версии файлов из предыдущего билда Windows 10 (1703 или 1607), проблема с производительностью RemoteApp исчезает. Как заменить файлы клиента RDP в Windows 10: 1. Закройте все RDP подключения и запущенные RemoteApp (лучше даже перезагрузить компьютер). 2. Скачайте архив с версиями файлов mstsc.exe и mstscax.dll из Windows 10 1607 (ссылка на скачивание с Я.Диска mstsc-w10-1607.zip). 3. Скопируйте оригинальные файлы mstsc.exe и mstscax.dll из каталога C:windowssystem32 в каталог C:Backup с помощью команд:md c:backupcopy C:windowssystem32mstsc.exe c:backupcopy C:windowssystem32mstscax.dll c:backup 4. Затем нужно назначить свою учетную запись владельцем файлов mstsc.exe и mstscax.dll в каталоге C:windowssystem32, отключите наследование и предоставьте себе права на изменение файлов:
takeown /F C:windowssystem32mstsc.exetakeown /F C:windowssystem32mstscax.dllicacls C:windowssystem32mstsc.exe /inheritance:dicacls C:windowssystem32mstscax.dll /inheritance:dicacls C:windowssystem32mstsc.exe /grant root:Ficacls C:windowssystem32mstscax.dll /grant root:F
(в этом примере имя локальной учтённой записи с правами администратора. Замените ее на имя вашей учетной записи). 5. Замените файлы в каталоге C:windowssystem32 файлами из скачанного архива. 6. Восстановим оригинальные разрешения на замененых файлах. Включим наследования NTFS разрешений и установим владельцем файлов «NT ServiceTrustedInstaller» командами:icacls C:windowssystem32mstsc.exe /inheritance:eicacls C:windowssystem32mstscax.dll /inheritance:eicacls C:windowssystem32mstsc.exe /setowner «NT ServiceTrustedInstaller» /T /Cicacls C:windowssystem32mstscax.dll /setowner «NT ServiceTrustedInstaller» /T /C 7. Осталось перерегистрировать библиотеку:regsvr32 C:WindowsSystem32mstscax.dll
—>
В этой статье описаны ошибки, которые могут возникнуть при подключении к виртуальной машине в Microsoft Azure.This article describes an error that you may experience when you try to connect to a virtual machine (VM) in Microsoft Azure.
Примечание
В Azure предлагаются две модели развертывания для создания ресурсов и работы с ними: модель диспетчера ресурсов и классическая модель.Azure has two different deployment models for creating and working with resources: Resource Manager and classic.В этой статье описывается использование модели развертывания c помощью Resource Manager. Для новых развертываний рекомендуется использовать эту модель вместо классической.This article covers using the Resource Manager deployment model, which we recommend using for new deployments instead of the classic deployment model.
СимптомыSymptoms
Не удается подключиться к виртуальной машине Azure с помощью протокола удаленного рабочего стола (RDP).You cannot connect to an Azure VM by using the remote desktop protocol (RDP).Подключение зависает на разделе «Configuring Remote» (Настройка удаленного рабочего стола), или появляется следующее сообщение об ошибке:The connection gets stuck on the «Configuring Remote» section, or you receive the following error message:
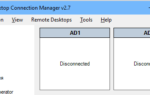 RDCMan (Remote Desktop Connection Manager) – RDP консоль для администратора
- внутренняя ошибка RDP;RDP internal error
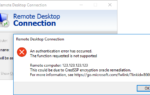
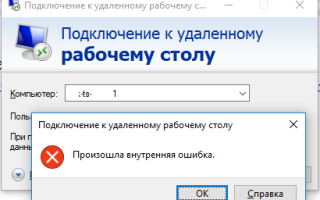
- произошла внутренняя ошибка;An internal error has occurred
- не удается подключиться к удаленному компьютеру с этого компьютера.This computer can’t be connected to the remote computer.Повторите попытку подключения.Try connecting again.Если проблема не исчезнет, обратитесь к владельцу удаленного компьютера или к администратору сети.If the problem continues, contact the owner of the remote computer or your network administrator
ПричинаCause
Эта проблема может возникать из-за следующих причин:This issue may occur for the following reasons:
- локальные ключи шифрования RSA недоступны;The local RSA encryption keys cannot be accessed.
- протокол TLS отключен;TLS protocol is disabled.
- сертификат поврежден или истек срок его действия.The certificate is corrupted or expired.
РешениеSolution
Прежде чем выполнять какие-либо действия, сделайте моментальный снимок диска ОС затронутой виртуальной машины в качестве резервной копии.Before you follow these steps, take a snapshot of the OS disk of the affected VM as a backup.Дополнительные сведения см. в статье Создание моментального снимка.For more information, see Snapshot a disk.
Чтобы устранить эту проблему, воспользуйтесь последовательной консолью или восстановите виртуальную машину в автономном режиме, присоединив диск ОС виртуальной машины к виртуальной машине для восстановления.To troubleshoot this issue, use the Serial Console or repair the VM offline by attaching the OS disk of the VM to a recovery VM.
Использование последовательной консолиUse Serial control
Подключитесь к последовательной консоли и откройте экземпляр PowerShell.Connect to Serial Console and open PowerShell instance.Если последовательную консоль не включено на виртуальной машине, перейдите к разделу repair the VM offline(Автономное восстановление виртуальной машины).If the Serial Console is not enabled on your VM, go to the repair the VM offline section.
Шаг 1. Проверка порта RDPStep: 1 Check the RDP port
-
В экземпляре PowerShell используйте netstat для проверки того, используется ли порт 8080 другими приложениями.In a PowerShell instance, use the NETSTAT to check whether port 8080 is used by other applications:
Netstat -anob |more -
Если Termservice.exe использует порт 8080, перейдите к шагу 2.If Termservice.exe is using 8080 port, go to step 2.Если другая служба или приложение, отличное от Termservice.exe, использует порт 8080, выполните следующие действия.If another service or application other than Termservice.exe is using 8080 port, follow these steps:
-
Остановите службу для приложения, которое использует службу 3389.Stop the service for the application that is using the 3389 service:
Stop-Service -Name -Force -
Запустите службу терминалов.Start the terminal service:
Start-Service -Name Termservice
-
-
Если не удается остановить приложение, или этот метод не подходит, измените порт для RDP.If the application cannot be stopped, or if this method does not apply to you, change the port for RDP:
-
Измените порт.Change the port:
Set-ItemProperty -Path 'HKLMSYSTEMCurrentControlSetControlTerminal ServerWinStationsRDP-Tcp' -name PortNumber -value <hexportnumbece termservice="" start-service=""> -
Настройте брандмауэр в соответствии с новым портом.Set the firewall for the new port:
Set-NetFirewallRule -Name "RemoteDesktop-UserMode-In-TCP" -LocalPort <new> - pan>Обновите группу безопасности сети для нового порта на порте RDP портала Azure.Update the network security group for the new port in the Azure portal RDP port.
-
Шаг 2. Установка правильных разрешений на самозаверяющем сертификате RDPStep 2: Set correct permissions on the RDP self-signed certificate
-
Чтобы обновить самозаверяющий сертификат RDP, по очереди выполните следующие команды в экземпляре PowerShell.In a PowerShell instance, run the following commands one by one to renew the RDP self-signed certificate:
Import-Module PKI Set-Location Cert:LocalMachine $RdpCertThumbprint = 'Cert:LocalMachineRemote Desktop'+((Get-ChildItem -Path 'Cert:LocalMachineRemote Desktop').thumbprint) Remove-Item -Path $RdpCertThumbprint Stop-Service -Name "SessionEnv" Start-Service -Name "SessionEnv" -
Если не удается обновить сертификат с помощью этого метода, попробуйте обновить самозаверяющий сертификат RDP удаленно.If you cannot renew the certificate by using this method, try to renew the RDP self-signed certificate remotely:
-
С работающей виртуальной машины с подключением к той виртуальной машине, на которой возникли проблемы, введите mmc в окнеЗапуск, чтобы открыть консоль управления (MMC).From a working VM that has connectivity to the VM that is experiencing problems, type mmc in the Run box to open Microsoft Management Console.
-
В меню Файлвыберите Add/Remove Snap-in (Добавить или удалить оснастку), выберите Сертификаты, а затем выберите Добавить.On the File menu, select Add/Remove Snap-in, select Certificates, and then select Add.
-
Выберите Computer accounts (учетные записи компьютера), выберите Another Computer (другой компьютер), а затем добавьте IP-адрес проблемной виртуальной машины.Select Computer accounts, select Another Computer, and then add the IP address of the problem VM.
-
Перейдите в папку Remote DesktopCertificates (Удаленный рабочий стол или сертификаты), щелкните правой кнопкой мыши сертификат и затем щелкните Удалить.Go to the Remote DesktopCertificates folder, right-click the certificate, and then and select Delete.
-
В экземпляре PowerShell из последовательной консоли перезапустите службу настройки удаленного рабочего стола.In a PowerShell instance from the Serial Console, restart the Remote Desktop Configuration service:
Stop-Service -Name "SessionEnv" Start-Service -Name "SessionEnv"
-
-
Сбросьте разрешение для папки MachineKeysReset the permission for the MachineKeys folder.
remove-module psreadline icacls md c:temp icacls C:ProgramDataMicrosoftCryptoRSAMachineKeys /t /c > c:tempBeforeScript_permissions.txt takeown /f "C:ProgramDataMicrosoftCryptoRSAMachineKeys" /a /r icacls C:ProgramDataMicrosoftCryptoRSAMachineKeys /t /c /grant "NT AUTHORITYSystem:(F)" icacls C:ProgramDataMicrosoftCryptoRSAMachineKeys /t /c /grant "NT AUTHORITYNETWORK SERVICE:(R)" icacls C:ProgramDataMicrosoftCryptoRSAMachineKeys /t /c /grant "BUILTINAdministrators:(F)" icacls C:ProgramDataMicrosoftCryptoRSAMachineKeys /t /c > c:tempAfterScript_permissions.txt Restart-Service TermService -Force -
Перезапустите виртуальную машину, а затем повторите попытку подключения к виртуальной машине с удаленного рабочего стола.Restart the VM, and then try Start a Remote Desktop connection to the VM.Если ошибку не удалось устранить, перейдите к следующему шагу.If the error still occurs, go to the next step.
Шаг 3. Включение всех поддерживаемых версий протокола TLSStep 3: Enable all supported TLS versions
Клиент RDP использует TLS 1.0 в качестве протокола по умолчанию.The RDP client uses TLS 1.0 as the default protocol.Тем не менее его можно изменить на TLS 1.1, который является новым стандартом.However, this can be changed to TLS 1.1, which has become the new standard.Если протокол TLS 1.1 отключен на виртуальной машине, произойдет сбой подключения.If TLS 1.1 is disabled on the VM, the connection will fail.
-
В экземпляре CMD включите протокол TLS.In a CMD instance, enable the TLS protocol:
reg add "HKLMSYSTEMCurrentControlSetControlSecurityProvidersSCHANNELProtocolsTLS 1.0Server" /v Enabled /t REG_DWORD /d 1 /f reg add "HKLMSYSTEMCurrentControlSetControlSecurityProvidersSCHANNELProtocolsTLS 1.1Server" /v Enabled /t REG_DWORD /d 1 /f reg add "HKLMSYSTEMCurrentControlSetControlSecurityProvidersSCHANNELProtocolsTLS 1.2Server" /v Enabled /t REG_DWORD /d 1 /f -
Чтобы предотвратить перезапись изменений политики AD, временно остановите обновление групповой политики.To prevent the AD policy from overwriting the changes, stop the group policy update temporarily:
REG add "HKLMSYSTEMCurrentControlSetServicesgpsvc" /v Start /t REG_DWORD /d 4 /f -
Чтобы изменения вступили в силу, перезапустите виртуальную машину.Restart the VM so that the changes take effect.Если проблема устранена, выполните следующую команду, чтобы снова включить групповую политику.If the issue is resolved, run the following command to re-enable the group policy:
sc config gpsvc start= auto sc start gpsvc gpupdate /forceЕсли изменение отменено, это означает, что в домене вашей компании уже имеется политика Active Directory.If the change is reverted, it means that there’s an Active Directory policy in your company domain.Чтобы впредь избежать этой проблемы, необходимо изменить эту политику.You have to change that policy to avoid this problem from occurring again.
Автономное восстановление виртуальной машиныRepair the VM Offline
Подключите диск ОС к виртуальной машине восстановления.Attach the OS disk to a recovery VM
- Устранение неполадок с виртуальной машиной Windows при подключении диска операционной системы к виртуальной машине восстановления с помощью портала Azure.Attach the OS disk to a recovery VM.
- После подключения диска ОС к виртуальной машине восстановления убедитесь, что в консоли управления дисками он помечен как В сети.After the OS disk is attached to the recovery VM, make sure that the disk is flagged as Online in the Disk Management console.Запишите или запомните букву диска, которая присвоена подключенному диску ОС.Note the drive letter that is assigned to the attached OS disk.
- Установите подключение с помощью удаленного рабочего стола к виртуальной машине, используемой для восстановления.Start a Remote Desktop connection to the recovery VM.
Включение журнала дампа и последовательной консолиEnable dump log and Serial Console
Чтобы включить журнал дампа и последовательную консоль, выполните следующий сценарий.To enable dump log and Serial Console, run the following script.
-
Откройте сеанс командной строки с повышенными привилегиями (запуск от имени администратора).Open an elevated command prompt session (Run as administrator).
-
Выполните следующий скрипт:Run the following script:
В этом сценарии мы предполагаем, что подключенному диску ОС присвоена буква F. Замените ее соответствующим значением для своей виртуальной машины.In this script, we assume that the drive letter that is assigned to the attached OS disk is F. Replace this drive letter with the appropriate value for your VM.
reg load HKLMBROKENSYSTEM F:windowssystem32configSYSTEM.hiv REM Enable Serial Console bcdedit /store F:bootbcd /set {bootmgr} displaybootmenu yes bcdedit /store F:bootbcd /set {bootmgr} timeout 5 bcdedit /store F:bootbcd /set {bootmgr} bootems yes bcdedit /store F:bootbcd /ems {<boot>} ON bcdedit /store F:bootemssettings EMSPORT:1 EMSBAUDRATE:115200 REM Suggested configuration to enable OS Dump REG ADD "HKLMBROKENSYSTEMControlSet001ControlCrashControl" /v CrashDumpEnabled /t REG_DWORD /d 1 /f REG ADD "HKLMBROKENSYSTEMControlSet001ControlCrashControl" /v DumpFile /t REG_EXPAND_SZ /d "%SystemRoot%MEMORY.DMP" /f REG ADD "HKLMBROKENSYSTEMControlSet001ControlCrashControl" /v NMICrashDump /t REG_DWORD /d 1 /f REG ADD "HKLMBROKENSYSTEMControlSet002ControlCrashControl" /v CrashDumpEnabled /t REG_DWORD /d 1 /f REG ADD "HKLMBROKENSYSTEMControlSet002ControlCrashControl" /v DumpFile /t REG_EXPAND_SZ /d "%SystemRoot%MEMORY.DMP" /f REG ADD "HKLMBROKENSYSTEMControlSet002ControlCrashControl" /v NMICrashDump /t REG_DWORD /d 1 /f reg unload HKLMBROKENSYSTEM </boot>
Сброс разрешения для папки MachineKeysReset the permission for MachineKeys folder
-
Откройте сеанс командной строки с повышенными привилегиями (запуск от имени администратора).Open an elevated command prompt session (Run as administrator).
-
Выполните следующий сценарий.Run the following script.В этом сценарии мы предполагаем, что подключенному диску ОС присвоена буква F. Замените ее соответствующим значением для своей виртуальной машины.In this script, we assume that the drive letter that is assigned to the attached OS disk is F. Replace this drive letter with the appropriate value for your VM.
Md F:temp icacls F:ProgramDataMicrosoftCryptoRSAMachineKeys /t /c > c:tempBeforeScript_permissions.txt takeown /f "F:ProgramDataMicrosoftCryptoRSAMachineKeys" /a /r icacls F:ProgramDataMicrosoftCryptoRSAMachineKeys /t /c /grant "NT AUTHORITYSystem:(F)" icacls F:ProgramDataMicrosoftCryptoRSAMachineKeys /t /c /grant "NT AUTHORITYNETWORK SERVICE:(R)" icacls F:ProgramDataMicrosoftCryptoRSAMachineKeys /t /c /grant "BUILTINAdministrators:(F)" icacls F:ProgramDataMicrosoftCryptoRSAMachineKeys /t /c > c:tempAfterScript_permissions.txt
Шаг 3. Включение всех поддерживаемых версий протокола TLSEnable all supported TLS versions
-
Отройте сеанс командной строки с повышенными привилегиями (Запуск от имени администратора) и выполните приведенные ниже команды.Open an elevated command prompt session (Run as administrator), and the run the following commands.В этом сценарии мы предполагаем, что подключенному диску ОС присвоена буква F. Замените ее соответствующим значением для своей виртуальной машины.The following script assumes that the driver letter is assigned to the attached OS disk is F. Replace this drive letter with the appropriate value for your VM.
-
Проверьте, который протокол TLS включен.Check which TLS is enabled:
reg load HKLMBROKENSYSTEM F:windowssystem32configSYSTEM.hiv REG ADD "HKLMBROKENSYSTEMControlSet001ControlSecurityProvidersSCHANNELProtocolsTLS 1.0Server" /v Enabled /t REG_DWORD /d 1 /f REG ADD "HKLMBROKENSYSTEMControlSet001ControlSecurityProvidersSCHANNELProtocolsTLS 1.1Server" /v Enabled /t REG_DWORD /d 1 /f REG ADD "HKLMBROKENSYSTEMControlSet001ControlSecurityProvidersSCHANNELProtocolsTLS 1.2Server" /v Enabled /t REG_DWORD /d 1 /f REG ADD "HKLMBROKENSYSTEMControlSet002ControlSecurityProvidersSCHANNELProtocolsTLS 1.0Server" /v Enabled /t REG_DWORD /d 1 /f REG ADD "HKLMBROKENSYSTEMControlSet002ControlSecurityProvidersSCHANNELProtocolsTLS 1.1Server" /v Enabled /t REG_DWORD /d 1 /f REG ADD "HKLMBROKENSYSTEMControlSet002ControlSecurityProvidersSCHANNELProtocolsTLS 1.2Server" /v Enabled /t REG_DWO -
REM Enable TLS 1.0, TLS 1.1 and TLS 1.2 REG ADD "HKLMBROKENSYSTEMControlSet001ControlSecurityProvidersSCHANNELProtocolsTLS 1.0Server" /v Enabled /t REG_DWORD /d 1 /f REG ADD "HKLMBROKENSYSTEMControlSet001ControlSecurityProvidersSCHANNELProtocolsTLS 1.1Server" /v Enabled /t REG_DWORD /d 1 /f REG ADD "HKLMBROKENSYSTEMControlSet001ControlSecurityProvidersSCHANNELProtocolsTLS 1.2Server" /v Enabled /t REG_DWORD /d 1 /f REG ADD "HKLMBROKENSYSTEMControlSet002ControlSecurityProvidersSCHANNELProtocolsTLS 1.0Server" /v Enabled /t REG_DWORD /d 1 /f REG ADD "HKLMBROKENSYSTEMControlSet002ControlSecurityProvidersSCHANNELProtocolsTLS 1.1Server" /v Enabled /t REG_DWORD /d 1 /f REG ADD "HKLMBROKENSYSTEMControlSet002ControlSecurityProvidersSCHANNELProtocolsTLS 1.2Server" /v Enabled /t REG_DWORD /d 1 /f -
Включите NLA.Enable NLA:
REM Enable NLA REG ADD "HKLMBROKENSYSTEMControlSet001ControlTerminal ServerWinStationsRDP-Tcp" /v SecurityLayer /t REG_DWORD /d 1 /f REG ADD "HKLMBROKENSYSTEMControlSet001ControlTerminal ServerWinStationsRDP-Tcp" /v UserAuthentication /t REG_DWORD /d 1 /f REG ADD "HKLMBROKENSYSTEMControlSet001ControlTerminal ServerWinStationsRDP-Tcp" /v fAllowSecProtocolNegotiation /t REG_DWORD /d 1 /f REG ADD "HKLMBROKENSYSTEMControlSet002ControlTerminal ServerWinStationsRDP-Tcp" /v SecurityLayer /t REG_DWORD /d 1 /f REG ADD "HKLMBROKENSYSTEMControlSet002ControlTerminal ServerWinStationsRDP-Tcp" /v UserAuthentication /t REG_DWORD /d 1 /f REG ADD "HKLMBROKENSYSTEMControlSet002ControlTerminal ServerWinStationsRDP-Tcp" /v fAllowSecProtocolNegotiation /t REG_DWORD /d 1 /f reg unload HKLMBROKENSYSTEM -
Отключите диск ОС и повторно создайте виртуальную машину, а затем проверьте, устранена ли проблема.Detach the OS disk and recreate the VM, and then check whether the issue is resolved.
—>
Столкнулся со странным сообщением “Произошла внутренняя ошибка/ An internal error has occurred” при RDP подключении к недавно развернутому серверу RDSH на Windows Server 2012 R2 из Windows 10. Буквально вчера RDP подключение к серверу работало нормально, но после установки и настройки RemotApp приложений и перезагрузки сервера, я не могу удаленно подключиться к его рабочему столу. Служба Remote Desktop Services судя по всему работает, так как пароль пользователя при подключении запрашивается.
Как я понял, сообщение RDP консоли “Произошла внутренняя ошибка” может появляться в различных случаях и иметь совершенно различные причины, связанные как с сервером Remote Desktop, так и с клиентом. В этой статье я постарался собрать все варианты решения и сценарий, который помог мне.
 Запускаем RDP на Windows 7 и 10 для нескольких пользователей
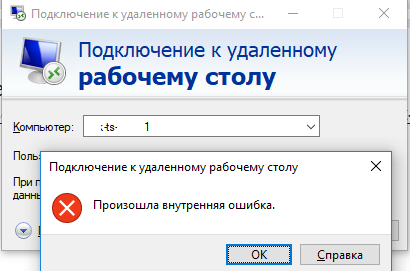
В первую очередь, убедитесь, что на RDS сервере доступен RDP порт 3389, и подключение не блокируется файерволом (Test-NetConnection rdsserver –port 3389).
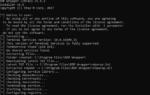
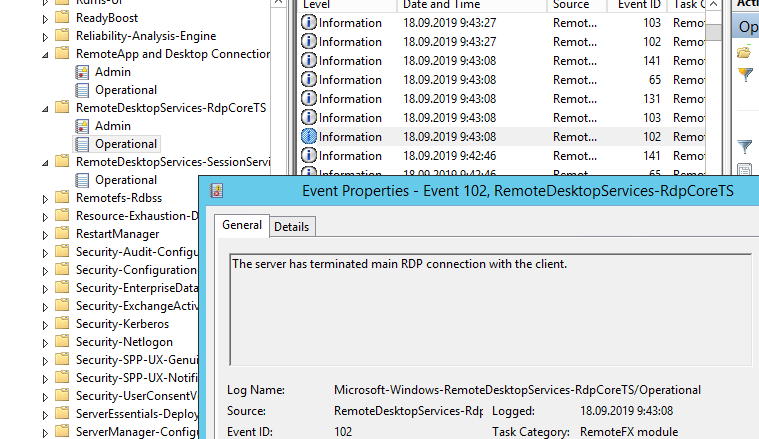
Изучив логи RDP подключений на удаленном RDS сервере, я не увидел никаких особенных ошибок. В журнале Microsoft-Windows-RemoteDesktopServices-RdpCoreTS/Operational видно, что RDP сессия создается:
The server accepted a new TCP connection from client 10.10.1.60:64379.Connection RDP-Tcp#3 createdНо потом без какой-либо ошибки RDP сеанс завершается:
The server has terminated main RDP connection with the client.The disconnect reason is 0
Проверьте состояние службу Remote Desktop Services на удаленном сервере и перезапустите ее. Вы можете удаленно перезапустить службу через консоль Services.msc (Connect to another computer), но гораздо проще проверить состояние службы и перезапустить ее через PowerShell:
(Get-Service TermService -ComputerName msk-ts1).status
Служба запушена (Running), перезапустим ее:
 CredSSP encryption oracle remediation – ошибка при подключении по RDP к виртуальному серверу (VPS / VDS)
Get-Service TermService -ComputerName msk-ts1| Restart-Service –force –verbose
![]()
Но проблему это не решило.
Какие еще варианты решения проблемы мне удалось найти в сети:
- Если у вас на удаленном сервере установлен КриптоПРО, он может быть источником проблем с rdp подключением. Попробуйте отключить проверку контрольных целостности файлов (проверки контрольных сумм) в КриптоПро через реестр. Перейдите в ветку реестра
HKLMSYSTEMCurrentControlSetControlSession ManagerCProIntegrityи измените значение параметра CheckMode на . Перезагрузите сервер. - Если в журнале событий TerminalServices-RemoteConnectionManager вы встретите событие с EventID 1057 (The RD Session Host Server has failed to create a new self signed certificate to be used for RD Session Host Server authentication on SSL connections), перейдите в каталог
C:ProgramDataMicrosoftCryptoRSA, переименуйте папку Machinekeys в Machinekeys_bak и перезапустите службу TermService. - Также нашел информацию, что RDP проблема “Произошла внутренняя ошибка” встречалась в Windows 10 1809, если на удаленном компьютере включена политика Configure H.264/AVC hardware encoding for Remote Desktop connections (находится в секции GPO: Computer Configuration -> Administrative Templates -> Windows Components -> Remote Desktop Services -> Remote Desktop Session Host -> Remote Session Environment). Для решения этой проблемы достаточно отключить UDP протокол для RDP, создав в ветке реестра
HKLMSOFTWAREPoliciesMicrosoftWindows NTTerminal ServicesClientпараметрfClientDisableUDPсо значением 1.
Ни один из рассмотренных выше сценариев не был применим в моем случае. Я совершенно случайно обнаружил, что с других компьютеров нет проблем с подключением к этому RDS серверу. Значить проблема только с моим компьютером, а не с сервером.
Я очистил историю RDP подключений в ветке HKEY_CURRENT_USERSoftwareMicrosoftTerminal Server ClientServers и сбросил кэш RDP в каталоге C:Users%Username%AppDataLocalMicrosoftTerminal Server ClientCache (перед удалением закройте все запущенные сеансы mstsc.exe):
del "C:Users%Username%AppDataLocalMicrosoftTerminal Server Clientcache"

После этого перезагрузил свой компьютер, и ошибка RDP подключения исчезла!
Используемые источники:
- https://zametkiit.ru/2018/07/%d0%bf%d1%80%d0%be%d0%b1%d0%bb%d0%b5%d0%bc%d1%8b-%d1%81-rdp-%d0%b2-windows-10-1803/
- https://docs.microsoft.com/ru-ru/azure/virtual-machines/troubleshooting/troubleshoot-rdp-internal-error
- https://winitpro.ru/index.php/2019/09/18/proizoshla-vnutrennyaya-oshibka-rdp/
 Теневое RDP подключение к рабочему столу пользователя в Windows 10
 RDP Wrapper Library: RDP для самых маленьких
 Enable Terminal Server/Multiple RDP Sessions on Windows 10
 Ограничение количества подключений Win10